The Camping Air Conditioner

air conditioner for camping

Camping Tips

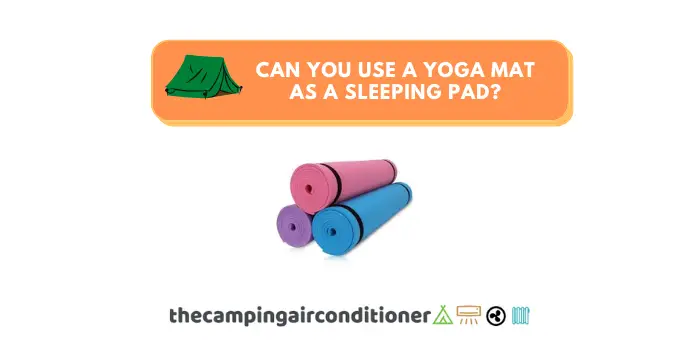
Can You Use a Yoga Mat as a Sleeping Pad? (Avoid Back Pain!)

One of my fondest memories is the first time I bought camping gear. I made sure to save up and buy the best gear available. And because of this, most of the gear I bought lasted me a couple of years and dozens of camping trips.

But one day, as I was packing up my gear, I noticed that my sleeping pad was ripped and couldn’t be used. And since I didn’t have time to buy a new one, I had to figure out what to use as an alternative.

At the time, the only thing I had was a yoga mat. However, most of the people I asked and the forums I went on stated that using a yoga mat as a sleeping pad wasn’t the best idea. And when I tried it out myself, I saw why.

If you don’t have a sleeping pad for your next camping trip, I don’t recommend a yoga mat. And in this article, I’ll explain why so you don’t make the same mistake as me.

Read on to learn more.

can you use a yoga mat as a sleeping pad

By the way, The Camping Air Conditioner is sponsored by readers. When you buy through one of our links, we may earn an affiliate commission at no extra cost to you.

Can I Use a Yoga Mat As a Sleeping Pad?

Let’s get one thing straight. If you don’t have anything else to lie on, a yoga mat will probably be better than laying flat on the floor. That being said, I don’t recommend yoga mats, especially if you’re after a comfortable night’s sleep.

Yoga mats are designed to make it more comfortable when working out and doing yoga. They are made to provide your body with a solid surface that is just soft enough to be a better option than working out or doing yoga on the floor. 

However, unlike sleeping pads and mattresses, yoga mats will not try to accommodate the shape of your body while sleeping, which is where the problems will start to arise.

The only semi-decent position to sleep in when using a yoga mat is laying flat on your back. If you’re a side sleeper, you’ll have a very uncomfortable night’s sleep.

Why You Shouldn’t Use a Yoga Mat as A Sleeping Pad

The first reason yoga mats aren’t the best sleeping pad alternatives is their design. Most of the camping gear you find, from a rainfly to sleeping pads, are designed for a highly specific purpose. This is why it feels very comfortable to lay down on a sleeping pad, even if you are in less-than-ideal conditions.

However, this isn’t the only reason yoga mats are a bad option for people needing a sleeping pad alternative, and here’s why.

Comfort

Before you try using a yoga mat as a sleeping pad, you have to ask yourself why you need a sleeping pad in the first place. You need a sleeping pad in your camping kit because it allows you to feel more comfortable when laying down.

These pads are designed to support your body and make sure you aren’t in an uncomfortable position while sleeping. Yoga mats aren’t designed to do this. These flat mats offer some cushioning but won’t offer that much support, which is why they will quickly start to be very uncomfortable to sleep on.

Here is a great sleeping pad I would recommend over a yoga mat.

Ecotec - The Best Sleeping Pad
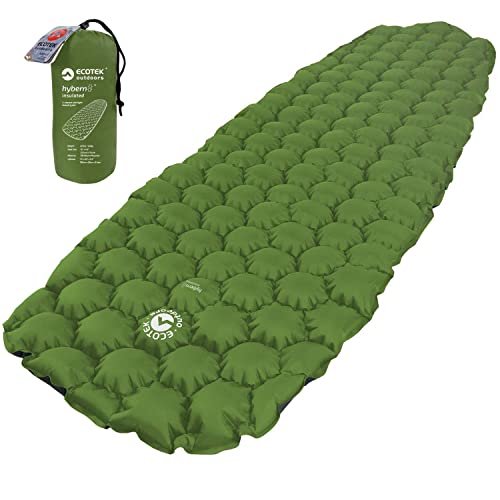
  • Comfortable and spacious
  • 4 Season pad with optimal insulation
  • Fast inflation and deflation
  • Lightweight and durable

Again, a yoga mat could work if you have no other choice. However, you will notice that you won’t feel nearly as comfortable as you would if you were on a sleeping pad. If you do decide to drink while camping, however, that might make your experience sleeping on a yoga mat a little bit better.

Insulation

Insulating your tent is very important when camping. This is relevant both during the winter when you want to keep the cold air away and during the summer when you want to keep the heat away from the tent. And one of the best ways to keep your tent insulated during the day and the night is by using a sleeping pad.

Aside from cushioning and support, sleeping pads offer insulation. With a yoga mat, you will get very minimal insulation. This is why the only times that using a yoga mat as a sleeping pad would be a good idea is if you’re camping in a warm climate and don’t have access to a sleeping pad.

Portability

When camping, it’s important to pack as light as possible while still bringing all the essentials. And when it comes to yoga mats, you can’t fold them the same way you could with a sleeping pad unless you want to damage them, which makes them awkward to carry if you need to reach your camping site on foot.

When Can You Use a Yoga Mat as a Sleeping Pad?

If you have no other option, that would be the only time I would say it is a good idea to use a yoga mat to replace the need for a sleeping pad. Additionally, you should also only use a yoga mat under these circumstances if you’re camping on the beach during the summer months.

If you’re planning on camping on the beach during the winter, you’ll be cold during the night, which will make the camping trip an unpleasant experience, to say the least.

Things to look for in a camping yoga mat:

  • Thickness (ideally as thick as possible)
  • Lightweight and easy to carry around
  • Resilient to general wear and tear and poor weather conditions

We did some research, and below is the best yoga mat you can buy if you’re going camping. It’s thick and resilient and is better than a lot of the yoga mats you’ll find on the market.

BalanceFrom Yoga Mat – Good Alternative for Camping
  • 71" long 24" wide ensures comfort for people of all shapes and sizes.
  • Double-sided non-slip surfaces
  • Exceptional resilience making it perfect for camping
  • Easy strapping and light weight design

Conclusion

Yoga mats are great for working out on them or doing yoga, however, they are far from the best option when it comes to sleeping on one during your camping trip. You’ll quickly find how uncomfortable they are to sleep, which will not only ruin your night’s sleep but make you feel sore in the morning.

The only times I would consider a yoga mat instead of a sleeping pad would be during the summer as I won’t need that much insulation anyway and if I have no other choice. The yoga mat is still better than sleeping flat on the floor.

10 Best Tips for Camping on the Beach During Winter

Beach camping is a great way to change scenery and break away from traditional camping in nature. Its advantages include cheaper accommodation, plenty of space, unique sunrise and sunset views, and the unbeatable feeling of falling asleep with the smooth sound of crashing waves. 

However, if you are considering camping on the beach during winter, you should prepare and plan accordingly to have a relaxing and enjoyable time and bring adequate camping gear with you. 

Let’s just say that I’ve learned from experience and that what I’m about to share with you are tips that you shouldn’t overlook if you want to have a great camping trip on the beach during the year’s colder months.

Read on to learn more!

Camping on the Beach During Winter

By the way, The Camping Air Conditioner is sponsored by readers. When you buy through one of our links, we may earn an affiliate commission at no extra cost to you.

Is Winter Camping a Good Idea?

Winter camping wouldn’t be the first idea to strike the normal person when it comes to picking a time and a place for a camping trip, but it’s definitely not unique. To start, beach camping during the winter is much cheaper, and very few people do it as hardly anyone goes near the water when it’s cold out.

Additionally, certain states like California permit bonfires on the beach, which is great news for those who want to keep warm during the colder months of the year. Not to mention that you can use bonfires to make food and whatnot on top (by the way, if you want to check this article to learn what is the best firewood for a campfire).

I’ve winter camped a number of times, and it’s great fun, as long as you plan everything out of course, and that’s exactly what I’ll get into in the next section.

bonfire while camping on the beach

How to Plan and Prepare a Successful Winter Beach Camping Trip

While a beach camping trip during winter can be a lot of fun, you need to plan it out properly, especially if you want to make the most of the trip. So, here are 10 great tips to help you do that.

#1 - Get an Accurate Weather Forecast

The first thing you need to do if you plan on camping during winter, whether on the beach or in the forest, is get a weather forecast. 

There are definite dangers when camping during winter, so it’s important to make sure to go on days that have relatively calm weather, and the temperatures won’t get too cold. Overall, we do not recommend beach camping with temperatures below 40 Fahrenheit degrees – it might get extremely cold with windy conditions.

Make sure to listen to the weather forecast (you can also use accuweather.com), and if it shows that the conditions won’t be ideal on certain days, it’s best to avoid those dates, especially if you’re up north, as the last thing you want to do is be freezing.

#2 - Stock Up on Sand Stakes

When camping on the beach, you can’t use the regular stakes for your tent. Sand is a very different type of surface, and standard tent stakes simply won’t hold your tent into place, especially if it’s windy. 

This is why I recommend visiting your local camping supply store to find sand stakes, which make it much easier to secure your tent on the beach. Overall, we advise that sand stakes have the following features (as a minimum):

What to look for in a tent stake for sand
Length  At least 10 inches long to allow for better anchorage, given how loose sand soil is
Width The wider, the better – The widest options will help in anchoring your tent on the ground
Design U-shaped or Screw tent to work better with sand.
Material There are multiple options. Preferably, pick options that will not bend in case o high winds, such as heavy-duty plastic, polycarbonate, and aluminium. 

Our go-to option is detailed below – Orange Screw comes at a great value for money and offers everything you need for a beach stake for your tent. 

Orange Screw: The Ultimate Ground Anchor for Sand
  • Lifetime Breakage Guarantee - If you break it, we will replace it!
  • Extremely lightweight - 100g
  • Heavy-duty and resistant (Polycarbonate Plastic)
  • Can be use in Sandy or Loose Soils
  • Length: 12 1/4''

#3 - Face the Tent Away from the Ocean

It might seem like a good idea to face your tent towards the ocean at first. After all, it allows you to walk out of the tent and take in the view, smell, and feel of the sea right away.

However, most experienced campers will tell you that when camping on the beach, regardless of the season, it’s important to face the tent away from the ocean.

The wind comes from the ocean, so facing your tent towards it will cause a lot of sand to enter your tent, which can be pretty uncomfortable and annoying to deal with.

#4 - Lubricate and protect the Tent Zipper

The humidity and salinity of the sea air can do some damage to your zipper. On top of that, the sand can get caught in between the tiny areas within the zipper, which can cause your zipper to get stuck in place. 

This can be very annoying on a camping trip, so I recommend lubricating the zipper before packing for the trip. If possible, try to protect the zipper area. 

#5 - Bring Layers and adequate camping gear

It might get cold during your camping trip. So, it’s important to dress in layers and bring a lot of warm clothing (i.e. thermal base layers). 

If possible, you could also get tent heaters that will make it much easier to get cozy and comfortable even when the temperatures start to drop outside.  

Other important reminders:

  • Check whether your tent has UV protection – Read our detailed guide on UV protection for tents for further details. Even though you are camping in winter, you might still be exposed to UVA and UVB rays that can damage your skin and lead to cancer in the worst-case scenario. 
  • ALWAYS wear sunscreen 
  • If you love camping cooking as much as I do, it might be worth considering a kitchen stand with windshield. Otherwise, you might get frustrated trying to prepare your meal. 

#6 - Find the Right Spot to pitch your tent

When camping on the beach, take your time to find the right spot, especially if you expect the weather to be windy. The ‘right spot’ is quite a subjective term as we all have different preferences, so it’s best to settle where you feel most comfortable.

Our preferences are:

  • Shaded areas to avoid excessive sun exposure 
  • At least 20m away from the waterline associated with high tides (trust me, as appealing as it might be, you don’t want to be too close to the water!)
  • As detailed above, face your tent away from the water

#7 - Bring a Sleeping Pad

The sand is not the best surface to sleep on. I’ve tried it, and it’s not great for a night’s sleep. I woke up a number of times during the night and in the morning, I was super tired and with mild back pain, to say the least. 

So, to avoid the experience that I had, bring your sleeping pad with you. My preferred option for winter camping is ECOTEK Outdoors Insulated Sleeping Pad (below), which offers good insulation, flexibility to adapt to sandy soil, and good comfort levels.

ECOTEK Sleeping Pad - Optimal Comfort
  • 4 Season pad with optimal insulation
  • Fast inflation and deflation
  • Lightweight and durable
  • Suitable for beach camping

#8 - Stay Hydrated

When going on a camping trip, you need to bring a lot of water and other liquids to keep you hydrated. The last thing you want to do is find a local store to buy water instead of enjoying your time camping right by the water.

How much water should you bring for your trip? According to Healthline.com, an adult’s recommended water intake per day is approximately 2 L. Therefore, check how big your group is and how long you will stay to find the right amount of water. 

#9 - Bring Firewood & Fire Starters

When camping, it’s essential that you understand camping stoves vs wood fires and when you should use each one of them. Since bonfires are allowed on most beaches in the states, bringing firewood and fire starters is a great idea, if you want to make a beach fire, of course

#10 - Don’t Leave Awnings Out

The beach can get very windy. If you leave your awnings out, the wind could blow them away and rip them away from you. If you don’t want this to happen, I recommend retracting the awnings, especially when the wind gets very strong.

I wrote an article with 13 useful tips to camp with high winds before, check it out to be better prepared for windy conditions.  

Conclusion

While most people associate the beach with summer fun, you can have a lot of fun at the beach, even when the temperatures start to drop. A winter beach camping trip may offer the unique camping experience you’ve been craving.

With that said, camping in the winter is very different from camping in the summer. So, if you’re planning a beach camping trip this winter, follow the tips from above to have the best possible time outdoors.

Can I Wash a Tent in the Washing Machine? (Why you Shouldn’t)

I go camping at least a few times a year, and I know many people do too. It’s relaxing, freeing, and a great way to get out of the hustle and bustle of the big city. And let me tell you, I have a great time every single time I go camping.

That is, however, until I come home and have to clean up my tent. To make the whole thing worse, sometimes, I’ve been very unlucky with the weather, which has made my tent a total mess.

One time I was really close to throwing it in the washing machine, and let it deal with the mess. If that’s your situation right now, stop!

In this article, I will talk to you about why washing your tent in the washing machine is a pretty terrible idea. To ease your situation, I’ll give you my best advice on washing your tent from the cleaning products and tools you need to the washing process you should follow depending on your tent.

Read on to learn more.

can i wash a tent in the washing machine

By the way, The Camping Air Conditioner is sponsored by readers. When you buy through one of our links, we may earn an affiliate commission at no extra cost to you.

Can You Wash a Tent in the Washing Machine?

One thing that you should never do to your tent is toss it in the washing machine. No matter how dirty your tent is, the solution is never a washing machine, especially a top-load one.

Sometimes, you can get away with cleaning a tent in an industrial front-load washing machine, but even that can sometimes be too risky and end up destroying your tent.

This is because tents have a lot of protective coatings on them to protect the people inside from the weather. Your tent may have UV protection shields, waterproofing material, and a whole lot more, and if you throw it in the washing machine, the wash cycle could do a lot of damage to the coating and the actual tent material.

With that being said, washing your tent is still a possibility and I’d personally highly recommend it. Washing your tent is a great way to free it from any dirt or debris, which could end up being the root cause for mold and other such particles.

How Can I Wash a Tent Properly?

If you aren’t supposed to wash a tent in the washing machine, how are you supposed to clean it?

Well, the answer to this depends on the type of tent you have, how dirty it is, and what you want to clean the tent from. To make it simpler, I’ve divided the cleaning process into three steps which can be much easier to understand.

And when you want to clean your tent, the first step is to:

Find the Right Tools

If you have a dirty tent, you won’t be able to clean it by hand. On top of that, the right cleaning materials and tools depend on the material that your tent is made of. However, a general tent cleaning tool set should include a watering hose, a microfiber cloth, and mild soap to loosen up the dirt.

Make sure not to use anything abrasive or made of heavy detergents as this can damage the tent’s coating and reduce its lifespan. And if you really want to give your tent a deep clean, there are a fair amount of specialized cleaning products for tents that you may be able to find in your local outdoor store.

Other things you’re going to need to clean the tent are:

  • A vacuum cleaner that has a brush attachment
  • A space to hang and dry the tent
  • White vinegar or as special cleaning product, such as Nikiwax (see below)
  • A bathtub for washing the tent
  • A towel for drying the tent unless you want to air dry it

Nikwax Tent & Gear Solarwash Cleaning and UV Protector, 500ml
  • Very affordable (less than $20)
  • Effective cleaning and increased UV protection
  • Spray-on (easy application)
  • Biodegradable 

Wash the Tent Based on Its Material

Once you have the right set of tools and cleaning materials, you’re almost ready to start cleaning your tent. Before you get started, the last thing I’d like you to do is check the material your tent is made out of as that will determine how to approach the cleaning process. 

If you’re not sure, you can either check with the manufacturer or read our article that goes into more detail on what tents are made out of to help you figure out the material of your tent.

For canvas tents, you won’t be able to wipe them down. So, you’re going to have to shake all the dust and debris out and then start vacuuming it. For a deep clean, you can submerge the entire tent in the bathtub where it can soak before you use the cloth to wipe off the excess dirt.

If the areas of the tent have developed mold or mildew, you can eliminate it using white vinegar and a cloth. This goes for all other tent materials as well.

If you have a polyester and a nylon tent, you’re in luck as the cleaning process is much easier and simpler. Most of the time, all you need to do is hose it down and then wipe it with the microfiber cloth. These materials are very easy to clean and are very light, making them a favorite for many backpackers and camping enthusiasts.

If you want to give the tent a deep clean, simply follow the same procedure as if you were to deep clean a canvas tent.

Fabric/Material How to Wash Your Tip?Notes and Tips
Canvas
  • Shake the tent
  • Vacuum it
  • For a Deep clean submerge in bathtub or large basin
  • Canvas tents are prone to mold development because of their organic nature – never store them wet
Polyester and Nylon
  • Use a hose and spray water across the tent (you can also use small amounts of soap)
  • Wipe down with a microfiber cloth
  • For a Deep clean – submerge in bathtub or large basin
  • While Nylon and Polyester tents are less prone to mold development, this fungus can quickly spread if stored with organic remains, such as food scraps and small amounts of soil. 

Dry it Before Storing It Away

Before you store the tent away, you have to make sure it’s dry. Otherwise the remaining damp can start growing into mold, which would make the tent unsuitable. This is because it is unsafe to sleep in a moldy tent for prolonged periods of time.

The best way to do this is to leave it out in the sun for a couple of hours until every part of the tent has dried completely. From there, you can fold it up, place it in the bag, and take it out again for your next camping trip. 

If you live in a part of the world where the weather is unpredictable, drying the tent outdoors can be a bit more complicated. One option is drying the tent indoors. 

To do this, you want to make sure the tent has plenty of space around it, there’s a fair amount of air flow, and there is warm air in the room. On top of that, all you need is patience as it can really take some time for a tent to dry indoors.

One thing you want to avoid at all costs is drying your tent in the tumble dryer as the heat and the drying process these appliances use can completely destroy your tent and even make it unusable.

Conclusion

Unfortunately, washing your tent in a washing machine is not an option as it can not only shorten its lifespan but even destroy it completely and make it unusable. 

However, there are plenty of other ways you can safely clean up your tent and get it ready for your next camping trip. So, depending on the type of tent you have, follow the steps from above to wash it safely and get it ready for your next adventure.

How to shower during winter camping? TOP Tips!

Camping in cold weather can be enjoyable – empty parks, quiet and silent environments, the ability to see different animals, and cheaper campgrounds are among the many upsides of the winter season. 

However, we all know: It can be challenging to shower while camping (even in summer), and the difficulty level climbs up several notches during winter days! The low temperatures and winds make us rethink going to a campsite. 

Don’t worry, though! Do you want to know how to shower during winter camping? We have prepared this article for you – it took us years of experience to pinpoint what works best and come up with it. 

To shower during cold weather camping, you might consider the following options:

  • Heat water under the sun
  • Use a solar shower
  • Bring a propane-heated shower
  • Buy an off-grid cabin shower
  • Clean up with special tissues and wipes (without water!)

Let’s go through a detailed review of these items below!

How to shower during winter camping

By the way, The Camping Air Conditioner is sponsored by readers. When you buy through one of our links, we may earn an affiliate commission at no extra cost to you.

How do you take a hot shower while camping?

Cold days might tempt you to skip showers, but no matter what, hygiene stays premium – according to healthline.com, infrequent showering can lead to several issues, such as a build-up of dead skin layers, excess dirt, and even trigger some skin issues, such as acne and dermatitis. 

The camping environment might speed up these processes and it is very important to keep your bathing routine. 

We’ve tested so many ways to clean up on a campsite over the years, and after many trials and ditching, we’re happy to note over the five best ways to help you have a warm shower while camping in freezing outdoors – let’s check them below!

Heat water under the sun

Using this method isn’t always possible, but if you are running on a budget, it might be your preferred choice. If you are camping where the sun is still up in the morning before it becomes chilly by nightfall, you can leverage this alternative.

Here’s what you should do:

● Simply travel with a basin in tow.

● Before it’s time to shower, fill up the basin with water and leave it in a sunny spot for a couple of hours. 

● Dip a finger, and take your shower when the temperature is right for you (The ideal temperature for a healthy and comfortable shower ranges from 98 to 104 degrees Fahrenheit, and never be over 110 degrees – it might damage your skin.)

Here’s our pro tip: use a basin made of stainless steel since metals have higher heat conductivity and will heat up water more easily and hold the heat longer too.

Use a solar shower

When you need better shower heating under the same conditions as above, another great option is to bring a solar shower in your trip. Solar showers use a water bag that absorbs heat from the sun more effectively (and still very cheap).

These products are designed to speed up the water heating process inside faster (i.e. normally manufactured in darker colors, such as black) so you can take your shower sooner. To use, follow these steps:

● Fill the bag with water
● Find a place with good sunlight and hang the solar shower.
● Feel the bag, and when the heat feels good enough, you are ready to go.

Some products like the RISEPRO 10 Gallon Camp Shower (see below – cost less than $20 bucks) come with a thermometer embedded, which facilitates control and safety. We find the thermometer comes in handy when camping in winter. This product also packs in more water for your camp showers.

RISEPRO 10 gallons/40L Solar Shower Bag Solar
  • Leakproof
  • Extra large capacity - 40L (10 Gallons)
  • Maximum heat absorbing design 
  • Thermometer embedded

If you’d rather pack light, go with one of the most trusted outdoor brands, Coleman 5 Gallon Solar Shower.

Bring a propane-heated shower

When you’re quite already invested in outdoor camping, a portable propane-heated shower can bring your winter camping experience to a new level.

Yes, that is right. These gas-powered equipment are highly efficient and will instantly provide hot water. However, they come at a higher investment than solar showers, and you will need to carry propane bottles around.

Depending on capacity and features, expect to invest anything between $150 to $300 – yes, we know – it isn’t ideal, but if you are camping with your family or looking for a more comfortable experience, they are totally worth it (you might also consider a luxurious tent, such as WhiteDuck Avalon – check our review in this article).

Below are our top 3 recommendations. We bought HikeCrew Portable Shower and Hot Water and have been using it for our tips without a hassle – what I liked about this product are its easy operation, embedded safety features, and compatibility with a car battery (12v). But, honestly, you will also be fine with the other two products.

Our choice
Hike Crew Portable Propane Water Heater
  • Portable propane shower and 12v (Car) compatible!
  • Automatic shutoff (safety mechanism)
  • Compact design 
Best value for money
Mr. Heater F235300
Mr. Heater F235300
  • Propane Operated
  • 12,000 BTUs increase water temperature 
  • Anti-scald protection 
Alternative
Coleman Hot Water on Demand
  • Fast heating
  • Very Compact
  • Fast ignition

Off-grid cabin shower

Even though they will not provide hot water, cabin showers can give you more privacy and protect your body from freezing wind. 

The opinions vary here – while some people do not see their trip without this gear, other campers tend to think that they are just extra luggage and you shouldn’t be bothered about them.

Our say? Totally worth the investment! Some models, such as ABCO portable cabin , cost less than $40 bucks and are foldable, easy to carry, and lightweight. 

We suggest using it combined with the options shown above (solar devices and portable propane showers).

cabin shower for winter camping

Waterless shower

Yes, that is right – you read it correctly. This roundup of ways on how to shower during winter camping wouldn’t be complete without options to clean up without water (yes, you read that right!).

In fact, even the National Park Service agrees water can be a luxury outdoors, and that body wipes are a viable option when showering just isn’t. The Luna Lifestyle XL Wet Cleansing Wipes is a family favourite.

Not only do these wipes save you time, they also significantly lessen your naked body’s exposure to the freezing cold. We like that it’s lined with eucalyptus and chamomile, both of which have natural antiseptic and antibacterial properties. As responsible campers, you should also laud this product for being biodegradable.

Another great option is dry bath gels and powders. We personally recommend the No-Rinse Body Bath. Here’s how to use it:

  •  Simply add a few top caps to a basin of water.
  • ● Soak in a washcloth, then squeeze.
  • ● Wipe the wet washcloth all over your body.
  • ● Pat dry with a towel.

Off Grid Winter Shower: More Tips & Buying Guide

The best options would be different for different people. At this point, it’s time to reflect on your camping lifestyle. Here are some pointers.

Safety

Without a doubt, non-electrical options like are absolutely safe to use. You never have to worry about the risks of electrocution.

As for gas or any electric-powered camp shower products, make sure to check out the safety features. Buy only from reputable brands and retailers. It’s just as important to make sure you read the manual and use it only as recommended.

Weather and Camping Conditions

Water may simply freeze when you leave it out to heat under the sun. In which case, it’s more logical to pack a portable propane heater like the HIKE CREW Portable Propane Heater.

Time in Camp

Opting for an overnight or over-the-weekend stay? In case the weather can get unbearably cold, it may be wiser to settle for waterless options.

On the other hand, prolonged camping calls for more sophisticated solutions to living in a tent. A key factor to consider for your shower is how well you can clean up regularly and maintain your usual grooming routine whenever you’re out in the open.

FAQ

Can you put hot water in a camp shower?

Absolutely! You may opt to heat water in a pot and use a small bucket to shower and rinse with.

However, if you’re planning to fill up a solar shower bag with hot water, make sure to check product use instructions before you do. You might end up damaging the product or hurting yourself.

How can I take a hot shower without hot water while camping?

The way we see it, you have two options. Either you find a way to heat that icy, cold water or, go waterless. Check out the options we listed in the previous section for details.

Final Thoughts - What is the best option for you?

We’ve shown you how to shower during winter camping. If you’re still wondering what’s the best product to buy for your next off-grid adventure, the answer you’re looking for is subjective.

Make sure to factor in the weather, location, the length of your stay, and how invested you want to be with your camping lifestyle. Being mindful of what you buy guarantees you get the best value for your buck.

Have a warm trip! 🙂

How Do I Insulate My Tent Floor? (To keep it warm and dry)

Camping is a blessing – we are always looking forward to our next trip and searching for new ways to improve our experience. Insulating your tent’s floor will certainly improve thermal comfort levels and make your shelter cozier!

But how do you insulate your tent floor? You just need to create a layer with insulating material, such as blankets, cardboards, foam pads, or heating blankets, and properly position it to ensure optimal thermal performance. 

Apart from the thermal control benefits, floor insulation might also help to control humidity and eliminate condensation problems, giving you the peace of mind that you are staying in a warm and dry environment. 

Keep reading this article to understand why you should pay attention to insulation, which materials you should use, and how to use them correctly. 

how do I insulate my tent floor

By the way, The Camping Air Conditioner is sponsored by readers. When you buy through one of our links, we may earn an affiliate commission at no extra cost to you.

Why should you insulate your tent floor?

The benefits for a camper are many, such as: 

1. Warmth

Insulating the bottom of your tent ensures better temperature control and a warmer environment, especially if you are camping in freezing temperatures (by the way, if you are planning to go camping in the snow, check this article snow camping hacks).

Depending on the material and volume of layers deployed (more details below), you can significantly increase temperatures – up to 25 Fahrenheit Degrees, in some cases – since it will trap your body heat inside and prevents any cold air from flowing in. 

Another positive side-effect? You will probably use less fuel/electricity for your camping heater.

2. Health

A cold and moist floor can make you uncomfortable and create health issues. This is due to dampness causing irritation to the skin around your feet and knees – especially when it is continuously humid or raining outside. 

High humidity can also lead to mold development and spread, creating respiratory problems for allergic and asthmatic people. 

If you have a moldy tent, we highly advise you not to use and/or sleep on it unless you altogether remove these microorganisms. 

If you ever notice mildew growth in your gear, clean it immediately with specific products, and ensure there is plenty of ventilation – read this post to learn how to prevent and remove mold from your gear

3. Tent and camping gear life-span

If your tent is not all-weather or a 4-season tent, it might not be well prepared to face cold, wet and windy conditions. 

By not insulating your tent floor, you also might increase the condensation rates inside your shelter, which is not ideal for a camper, especially during winter. Why? 

First, Your tent fabric (and floor) might not support the temperatures, and you might risk waterproofing deterioration and fabric tearing due to the combination of moist and cold temperatures. Similarly, your camping gear, such as sleeping bags and clothes, might be drastically affected. 

Things can get even worse if you do not use an adequate heater inside your heater, as gas heaters tend to release water in the air as a consequence of gas combustion (in this post, we advise you which heaters might lead to higher condensation). 

camping in snowy conditions - tent floor insulation

What material should I use for insulating my tent floor?

There are a couple of options, which includes:

1. Blankets – Blankets are probably the first floor insulation approach that comes to mind. They are not only easy to use, but they will keep you warm and comfortable during the night. Further, you can easily fold and store them and make them adapt to any shape, apart from providing an extra cushion layer. The disadvantages: they might easily get dirty and wet by absorbing humidity. 

2. Cardboard – While cardboard might seem like a strange option for insulating your tent floor, it is actually one of the easiest methods available. All you have to do is take and cut up old cardboard boxes into thin sections that can be placed on your tent’s floor. The more layers of cardboard you put down, the better insulated your tent will be.

3. Foam pads – Foam pads are probably the best way to go because they are easy to store and transport. They are soft enough and will also provide extra comfort when you are lying down over them. 

4. Heating blankets – If you want the ultimate insulation for your tent’s floor, heating blankets might be the way to go. These special blankets can be plugged into your car’s cigarette lighter or any 12-volt device that you have in your tent (see option below). 

When in use, heating blankets provide comfort and warmth for people who are camping in extremely cold areas or for those who feel the cold in their bones easily – be careful, though – I wouldn’t sleep with them turned on the whole night (pick an option with timing function, as SJC Electric Blanket).

SJC Electric Blanket
  • Soft material Size
  • Timing Function - 30/45/60 minute timing function.
  • Fast Heating and 12-v compatible
  • Hand Washable

5. Rugs and clothes – While you can use rugs and clothes to insulate your tent floor, they will provide minimal insulation and are probably the less effective way. The best way to improve the insulating power of your rugs and clothes is to add multiple layers of clothing or blankets.

6. Sleeping bags – Sleeping bags are a great way to add extra insulation to your tent floor. If you have a sleeping bag with thick padding for the inside, this will be ideal for your purposes. Another great way is to use old sleeping bags is by cutting them up into sections and putting them on top of one another. 

7. Tent Tarps – A tarp with waterproofing features can significantly improve your insulation against cold weather and moisture, and it is a very cheap investment, costing less than $20 (as this model). Make sure to check the dimensions to ensure the whole floor is protectec. 

How to insulate your tent floor?

After picking your preferred insulation material, it is time to use it (we note that you can use more than one option combined to increase thermal comfort – in fact a combined solution is the most efficient way to go).

Follow these steps: 

  1. Lay down your tent tarp and pitch your tent over it. 
  2. Make sure that your tent is in tip-top shape before adding any insulating material. A leaky tent will only cause more trouble as the moisture from the outside will seep into your sleeping area and worsen things. 
  3. You might need several insulating layers if you decide to go ahead with blankets or cardboard options – place them carefully and in an organised manner so they are flat and there is no uneven surface on the floor (it might cause back pain).
  4. On the other hand, foam pads are very efficient, and one block might be sufficient. They are flat by nature and easy to set up. 
  5.  Position your sleeping bag or pad above the layers, and you are ready to have a cozy night. 

Editor’s Note: If you plan on using a tent heater during cold nights, make sure you comply with all safety requirements, such as ensuring minimal ventilation for portable gas heaters – read this article to learn how to use heaters inside your tent safely

Additional tips to keep warm in a tent

1. Consider buying a four-season tent – These days, there are tents specially designed to support cold weather and harsh winter conditions. They are known as 4-season tents, such as NatureHike Cloud Up (2 and 3 person models available), and come with outstanding waterproofness. 

Naturehike Cloud-Up 2 and 3 Person - 4 Season
  • 4 Season Tent - double layers 
  • Waterproofness - 4000mm (one of the highest in the market)
  • Weight - 4.18lb
  • Good value for money

2. Pick a canvas tent (if possible) –  If you are camping in a big group or for long term, choose a canvas tent since they provide better insulation, and some models, such as WhiteDuck Avalon, come with stove jacks that allow the use of a portable woodstove inside your tent.

However, if you are on a short trip or backpacking, a canvas model might not be ideal (heavier and longer to set up)

3. Always pitch and keep your tent in a dry area where it will be safe from water damage. This can prevent mold, mildew, and rotting of your tent. 

4. Be sure that your tent floor is flat and solid. If your tent floor dips or rocks from side to side, this can cause weight shifts that could damage your tent and even cause leaks that could break your insulation.

5. Make sure your sleeping bag is clean and dry before using it or storing it at night.

6. Wear layers of clothes and bring an electric blanket –  This is especially important if you are not using a 4-season insulated model. The more layers you have on, the warmer you will be – wear fabrics that provide maximum warmth, such as wool and thermal layers. 

7. If you are using a gas camping heater, make sure that you pay attention to safety measures, which include constant ventilation and airflow to avoid carbon monoxide poisoning (read more tips in this article)

8. If camping in extreme weather conditions, it might be worth considering a tent insulation liner

Final Thoughts

Insulating your tent floor is an easy way to improve comfort in a tent during freezing conditions. You can easily do it with camping gear that you already have or are extremely affordable, as shown above.

If you are camping in extreme weather, a 4-season tent or a canvas model might be worth considering – both come with outstanding insulation features.

And before we forget, bring a suitable heater to ensure a cozy and warm night. 

Is it safe to sleep in a moldy tent? (Why you shouldn’t!)

Camping is the best way to enjoy nature in a carefree and close-to-nature setting. And that’s what makes it so great! The problem is that many other things can interfere with your camping experience. One of those things? Mold.

Mildew, mold, and other types of fungus grow easily in areas with high levels of humidity and temperature, especially when there’s dampness and water around. 

Mold is dangerous and can cause several health problems, even in small amounts. It can be especially dangerous for children, pets, and the elderly, who can suffer from health problems like dry eyes or skin rashes due to allergies. 

It is also well known to be harmful to people with respiratory diseases like asthma and tuberculosis as it can worsen the symptoms or trigger allergic reactions. 

Overall, we do not recommend you sleep in a moldy tent. However, if you have found some traces of these organisms in your gear, don’t panic – in most cases, you can remove them with simple steps and measures, as detailed in this article. 

Keep reading to learn more about what mold is, how to remove and prevent it, and whether you should sleep in a moldy tent. 

is it safe to sleep in a moldy tent

By the way, The Camping Air Conditioner is sponsored by readers. When you buy through one of our links, we may earn an affiliate commission at no extra cost to you.

What is mold? (and why is bad to have in your tent?)

Mold is a type of fungus that can grow in many places, but it’s most common near or around water and in an environment with high humidity. Most mold variants tend to grow and spread very fast on damp surfaces such as toilets, showers, walls, basements and crawl spaces. 

Mold can cause allergic reactions in people with sensitive immune systems and cause respiratory issues. Some variants produce toxins called mycotoxins, which may lead to severe illness, cancer induction, and immune deficiency in food-borne types, according to the World Health Organisation

Mold may reside on any porous surface with enough moisture, like carpeting or wood. In your house, it is often found in damp environments such as closets or basements and warm and wet areas such as bathrooms or kitchens. 

How do they occur in tents? We explain below. 

What causes mold in a camping tent?

If you suspect that you have mold in your tent, you haven’t been doing a great job of keeping it dry. Or, in some cases, the tent was made with mold-friendly material (read below to check which fabrics can develop mold).

As previously discussed, this fungus is the best friend of a damp environment, so if you store your gear in a hot environment with high humidity, mold will likely grow and spread around.

Also, you might be exposed to mold growth during camping trips if you are staying close to areas with sources of moisture, like lakes or rivers or if there is extra humidity caused by a nearby jungle or forest.

(By the way, read this article to check some times on how to camp in high humidity).

What tent fabrics develop mold?

Different tent fabrics will have different tolerance levels to mold growth, as detailed below:

  • Polyester – Polyester is a common synthetic tent fabric that is easy to clean and often quite strong. However, it can also be prone to mold and mildew if you don’t treat it properly after camping, especially if there is any soil or organic traces from which these organisms can feed., according to this note from the Canadian Government.
  • Nylon/PVC – Similar to polyester, Nylon is a synthetic fabric that can be susceptible to mold with the presence of organic material.
  • Canvas – It is probably the most susceptible to this fungus growth, given its organic composition (cotton and linen) that is “mold-friendly”

Bear in my that whatever tent fabric you are using or planning to buy, always keep your gear clean and dry. 

Tent FabricProne to Mold?Note
PolyesterLower probabilitySynthetic fabric – avoid storing it wet and with organic remainings, if you want to prevent mold growth
NylonLower probability Synthetic fabric – avoid storing it wet and with organic remainings, if you want to prevent mold growth
CanvasHigher ProbabilityOrganic Fabric – Susceptible to mold growth just with water, given organic nature
moldy tent and stains
Source: https://medium.com/

Can I sleep in a moldy tent?

We do not recommend it, given the implications for your health and respiratory system. However, a small group of people suffer no ill effects from sleeping in tents with these microorganisms (hopefully, you are one of them because we always suffer with it). 

The majority of people experience a variety of symptoms ranging from allergic reactions to breathing problems, including runny rose, eye irritation, and constant sneezing. 

This can be especially dangerous if you are asthmatic or have other conditions that make you more sensitive to the spread of mold and mildew.

While scientists haven’t proven exactly how harmful it is to live in or sleep in an environment with mildew, there are certainly many indications that suggest that exposure can do harm over time. This would also seem to hold true for camping tents as well.

Do I need to dispose of a tent that has been contaminated by mold?

Well, it depends. 

If the mold is not too severe, you can clean your tent using some simple steps, as in the next section below. A mixture of water and bleach (always non-chlorine!) can sometimes be effective in completely removing any traces of mold from your tent – use it carefully, though, as it might stain your tent. 

However, some mildew stains can be impossible to completely remove. One thing that you can do to get rid of the odour leftover from mildew is to use a commercial mildew stain remover spray, such as RMS-866 isntand mold and mildew remover (see below)

RMR-86 Instant Mold and Mildew Remover Spray
  • Remove mold and odors
  • No Scrubbing needed
  • Very cheap! 

How can I remove mold from my tent?

There are a number of different methods that have been used by campers to get rid of these harmful microorganisms. Here are some of the most effective in removing them from your tent and camping gear:

1. Washing with warm water and soap: If you can’t manage to get the mold out of your tent in a number of showers, you may consider washing it with warm water and soap. Use a gentle detergent, and be sure to rinse well.

2. Undiluted white vinegar: This is the simplest way to remove mould from fabrics, but it has a strong smell that is not for everyone! If you don’t mind the smell, then one or two applications will take care of the problem. Just pour some over the affected area, wait a few minutes, and then scrub out with a glass of warm water (be careful when scrubbing to avoid damage to your fabric). We advise letting it dry in an open and ventilated area so that odours are carried away. 

3. Bleach: If you know that your tents have been exposed to mildew, you can also apply some bleach to get rid of it. Non-chlorine options work well without damaging fabrics, but you can use regular bleach for colour-safe fabrics.

4. Use an industrialised solution, such as RMS-866 isntand mold and mildew remover

Editor’s Note: Bleach, vinegar and detergents may corrode your tent if they are used on sensitive material. Be sure to read the manufacturer’s instructions so you can determine the best way to remove these fungi from your tent.

How can I prevent mold from growing in my tent?

There are several ways to prevent mold from growing in camping tents:

  • Tent moisture management: Whenever possible, avoid camping in humid areas, especially near lakes or rivers where the surrounding plants and ground tend to draw in moisture. If you can’t prevent these types of camping environments, make sure that your tent is completely dried out after each use.
  • Wipe off moisture: Always wipe off excess moisture from your tent before you pack it away. This includes both rain and condensation from the warm air inside the tent (by the way, you might be interested in this article – Will a heater stop condensation in my tent?).
  • Keep your tent clean: As discussed, organic material remainings might support the development of not only fungi but also bacteria. 
  • Air Circulation: Make sure you camp in a tent with good ventilation so that dampness is removed from your shelter. It might be good to consider a solar-powered camping fan, such as BusyPiggy solar fan with Led (a very cheap option – less than 30 bucks- see below!).
BusyPiggy Solar Camping Fan
  • USB / Solar Powered
  • LED Light embedded 
  • Affordable! 
  •  Don’t use moldy camping gear: Last but not least, if you ever notice that a piece of camping gear has become infected while in storage, it is best to separate it away and not bring it to your trip (you don’t want your other gear to get contaminated). Fungi can spread incredibly fast, especially in scorching and wet weather. 

Final Thoughts

Ensuring that your tent and camping equipment stay dry, clean and get plenty of air circulation is essential in preventing the growth of unwanted microorganisms.

If you suspect mould is growing in your tent, clean it immediately and do not sleep on it. Remember that allergic reactions to mold can be serious and possibly life-threatening.

Breathing in mold spores can cause lung inflammation, leading to respiratory disorders.If you feel an immediate reaction such as a stuffy throat and difficulty breathing after camping in a damp tent, don’t hesitate to look for medical help immediately.

Make sure that your medical providers understand that you have been exposed to these fungi so they can administer the proper procedure for any reactions.

Canvas vs Nylon tents – What fabric should you choose? (EXPLAINED!)

The choice of a camping tent might significantly impact the comfort of your getaway trip. You should always be careful when choosing the tent’s shape, size, and fabric. 

These days, shelters are manufactured with different materials, such as polyester, DCF, nylon, and canvas. These last two options are probably the most common fabrics in the market, and a natural question arises –  which tent fabric should you choose – canvas or nylon? 

Well, it depends. Each fabric has advantages and drawbacks, and your final choice will ultimately rely on your needs and preferences. 

For example, canvas tents are known for their high breathability, insulation, and thermal comfort, whereas nylon options are lightweight, usually have better waterproofness, and are easier to maintain. 

Let’s go through a detailed explanation and the pros and cons of each material. 

canvas vs nylon tents

By the way, The Camping Air Conditioner is sponsored by readers. When you buy through one of our links, we may earn an affiliate commission at no extra cost to you.

What is Canvas? (and what are its pros and cons)

Canvas is a fabric usually made of cotton and linen, which might also contain some parts of polyvinyl chloride (PVC) to enhance its waterproofness. 

The fabric is highly recognised for being resistant, sturdy, and has excellent tear strength. Apart from tents, the material is also used to manufacture sails, bags, a wide variety of fashion pieces, equipment covering, and many others. 

Canvas tents - Pros and cons

Canvas tents are broadly known for their heavy-duty features and outstanding thermal comfort, providing campers with high insulated environments. 

The porous structure of cotton also ensures high breathability and decreases the risks of condensation inside a tent, making it ideal for both summer and winter camping

Because of all these characteristics and the ability to create a sophisticated design with this fabric (such as a bell shape), this fabric is the number of choice for luxurious shelters and glamping tents, such as the WhiteDuck Avalon Bell Tent (picture below).  

Most larger canvas models already come with stove jacks, allowing you to cook inside your tent without concerns or worries about monoxide carbon poisoning. This is especially advantageous during winter camping, where you want to keep warm and cozy while cooking in your portable wood stove.

On the other hand, canvas tend to be less water-resistant than nylon models, and their hydrostatic head is usually not as high as other fabrics (around 1000mm). By the way, you should read this article, if you want to understand further whether your tent is waterproof (and how to make them water-tight). 

Also, the fabric robustness comes at a cost – it is heavier than other tent fabrics and usually takes longer to set up. These models might also require extra care and maintenance because they are more prone to mold development, and be more expensive. 

The table below summarises our top 5 pros and cons of canvas tents. 

Pros
  • Heavy duty and sturdy
  • Excellent Durability
  • Excellent insulation
  • Luxurious options and appealing design
  • Ideal for long term camping
Cons
  • Expensive
  • Higher maintenance
  • Develop mold more easily
  • Heavier and takes longer to set up
  • Waterproofness levels are lower 

What is Nylon?

Nylon is a fabric created from a polymerisation reaction of crude oil. Too complex? Yes, we agree. In summary, it is a synthetic material with many variants that have evolved according to industry needs. 

Nylon looks like a flexible plastic and can be combined with different chemicals to acquire specific features. Apart from being used in tents, this material is also used in clothing, ropes, army gear, and even by 3-D printers. 

Nylon Tents - Pros and Cons

Nylon tents are an excellent alternative for those after lightweight options and pop-up tents. This fabric has a low density, with some variants reaching as low as 1. 15 tons per cubic meter, while canvas weighs around 1.42 tons per cubic meter (nylon is roughly 23% lighter).

Given its weight, nylon models are the preferred models for backpackers, hikers, or campers who need mobility. Another great advantage of this fabric is its price – they are significantly cheaper than canvas tents, with plenty of excellent models costing less than $100.

The ease of set-up and incredible waterproofness also draw the attention of mountaineers professionals, who value these features the most. For example, NatureHike Cloud-Up (picture below) weighs only 3.5lbs and has an outstanding 4000mm waterproof protection, while costing less than $150. 

Among the drawbacks, we can highlight:

  • the lack of breathability and higher chances of condensation,
  • the fabric is not eco-friendly,
  • faster deterioration when exposed to UV rays (even though you can use UV sprays to protect them – read more here)
  • Lower durability
  • Poor insulation
Pros
  • Cheaper
  • Lightweight
  • Easy set up
  • Compact
  • Ideal for backpackers and hikers
Cons
  • Not eco-friendly
  • Poor thermal insulation
  • Susceptible to UV rays
  • Lower durability
  • Low breathability and higher condensation risks

Canvas vs Nylon tents - When to use each?

We have drafted the table below to help you to make your choice for you next tent. Review the features that you required and ensure to pick the fabric that best suit your needs.

Which fabric should you use? Canvas Nylon
Glamping X  
Long-Term Camping X  
Backpacking   X
Hiking   X
Cooking inside a tent (w/ stove jack) X  
Rainy weather    X
Ease of set up   X
Budget-Friendly   X
Better Insulation X  
Breathability X  
Easier maintenance   X
Lightweight   X
Eco-friendly X  
UV protection X  

Editor’s notes:

a) There are affordable canvas tents with quick setup, such as Kodiak Basic Flex-Bow (see below)

b) Do you already own a nylon tent and want to go winter camping? Learn how to insulate your tent with easy and cheap steps in this article

c) Do not cook inside your tent unless it is equipped with a stove jack – check this article with some of our preferred models

Kodiak Basic Flex-Bow Quick Set Up
  • 4-season tent with optimal insulation
  • Quick and easy set-up
  • EXCELLENT Value-for-Money
  • Up to 6 campers

Final thoughts

There is no perfect fabric – each material will come with a suite of pros and cons. However, some models suit better certain camping conditions than others. 

Overall, our recommendation is:

  • For medium and long-term camping – pick a canvas model
  • Worried with weather conditions (winter/summer camping) – choose a canvas model
  • Does the forecast show rainy conditions? You will not be 100% dry with a canvas model 
  • Hiking and backpacking? No doubt, pick a nylon option.
  • On a budget? Nylon models are much cheaper. 

Can you keep food in your car while camping? (How to SAFELY do it!)

You are probably planning your next camping trip and wondering how to bring and store food at your campsite, right?

While some people use cooler boxes, plastic containers, and even camping fridges to store supplies, many campers wonder whether it is possible to keep food in their cars?

Yes, you can store your food supplies in your vehicle. However, you need to be aware that it might attract insects and animals, such as bears and racoons, which might create unexpected and dangerous events on your trip, and pay attention to campground rules.

Another point of concern is the high temperatures inside your vehicle. If your car is parked in a sunny area or can get warm quickly because of local weather conditions, your supplies might get spoiled, especially those that require refrigeration (meat, milk, etc.) 

So, how to do it safely? We prepared some special and wise tips – keep reading them below!

can you keep food in your car while camping

By the way, The Camping Air Conditioner is sponsored by readers. When you buy through one of our links, we may earn an affiliate commission at no extra cost to you.

How to safely store food in your car while camping?

The major concern around food supplies storage on a camping trip is attracting dangerous animals. 

Even though cars are theoretically physically insulated, the smells from containers can easily spread across the campsite and draw the attention of bears and other species.

The next paragraphs will detail some wise tips on how to safely keep store your supplies.  

#1 Check your camp ground rules and camping location

Each camping ground has its own specific rules for drinking alcohol, length of stay, behaviour and even food storage rules and guidelines. 

As a general rule, the National Park Services from the US guide include the following tips to avoid bears

  • Some parks will allow you to store food in your car, as long as windows are kept close during the day. During the night, they should be removed and put in a locker (if you are in the US, check the NPS for more info regarding your site). 
  • Always keep your tent and surrounding areas clean, and never leave food scraps around your camping location (this includes keeping your dishes and cutlery clean – wash them straight away after a meal).
  •  DO NOT store food in your tent – the last thing you want in the middle of the night is being visited by a racoon or rat after your food. 

Bear in mind that each camping site will be prone to the presence of different animals. For example, while black bears love forests with plenty of fruits and nuts tree options, racoons prefer woodland areas with high humidity (by the way, we have prepared special tips and hacks on how to camp in high humidity in this article).

Therefore, check your camping location characteristics and which animals are common in that area so that you can bring the right accessories to store food in your car and have a safe trip.

#2 - Keep car door and windows closed all the time

Even though it might look that cars are insulated, the truth is that some animals have an incredibly advanced sense of smell and can detect food aromas from distances that are unthinkable for human beings. 

For example, a black bear can sense odours over a mile away, which is impressive and scary  at the same time! 

Keeping the doors and windows of your car closed is mandatory and might somehow decrease smells spreading, but, to be honest, it will not be 100% effective in keeping animals away. 

If you are camping in a small car, you might check some special tips on how to comfortably do it in this article

how to store food in your car while camping safely

#3 - Choose your camping food (and gear) wisely

Scent foods are the ones that will most likely make animals come around, as their smell highly attracts them. The list below details some scent and unscented foods – if possible, stick to unscented options.

Unscented Foods (Do no attract animals)Scent Foods (attract animals)
  • Rice
  • Pasta
  • Nuts
  • Dried Foods
  • Protein Bars
  • Canned foods (closed)
  • Packed gels 
  • Eggs
  • Meat
  • Bacon
  • Fish
  • Sweets
  • Onions
  • Coffee
  • Bread
  • Butter

Important note: Be careful – Cosmetics, deodorants, scent soap and shampoos might also  attract bears. 

#4 - If you are bringing scent food, store it in odour-proof containers.

We get it – camping without scent food might be impractical for some campers. What to do then? Consider the following:

a) Bring a bear/animal safe and resistant lit storage, such as Frontiersman 11.86L storage container (Water and Airtight – picture below), which prevents food aroma from attracting animals. It is slim, effortless to carry around (even for backpackers), and weighs only 3lb. It will easy fit the back of your car.

b) Use odour-proof and airtight bags to store your meals and, if possible, store them inside a well-insulated cooler to keep the likes of meat and fish. 

c) Wrap your food in aluminium foil or plastic wraps, which will help insulate its smells. 

#5 - Keep the food hidden and covered in your car

So far, our measures have concentrated on keeping animals away from you and your tent. 

However, you need to understand that you might be in their natural habitat, which means they might be around, even though there are no smells attracting them. 

As a safety measure, keep food hidden in your car. How to do it? Easy: 

  • Put your supplies in the car trunk
  • If not possible, cover your food containers with a blanket
  • Never leave any can or smelly food open. Apart from bears, you might attract mice, cockroaches and other small insects. 

#6 - Choose your car parking area wisely

Temperatures can get extremely high in a car with closed doors and windows and spoil your food, even if it is parked in the shade. According to this study from Arizona State University, the dashboard of a car can reach up to 160 degrees Fahrenheit when exposed to the sun for one hour (see picture below). 

Source: https://news.asu.edu/20180516-discoveries-asu-study-hot-cars-can-hit-deadly-temperatures-within-one-hour

The USDA considers the range of temperature between 40 and 100 degrees Fahrenheit as a “danger zone” and explains that in the interval, the bacteria growth level can double and quickly spoil perishable food (especially those that require refrigeration)

Therefore, be careful when choosing your car parking area – give preference to shady areas with plenty of air circulation so that temperature inside your vehicle stay out of the “danger zone”. 

Always remember –  it is recommended that you never leave food without refrigeration for more than 2 hours. And how to keep food refrigerated in your car while camping? Fortunately, there are portable and compact camping fridges (see below).

#7 - Consider a 12-v car camping fridge

Yes, you are right – many 12v mini-fridge models can run from your car battery without draining it (you might need to turn your car on every now and then).

BougeRV 12V refrigerator comes at an excellent value for money, decent size – 23 quarts (21.7L), lower power consumption, and fast cooling, which might be ideal for your trip.

However, if you are constantly camping or will bring plenty of meat for BBQs, consider a larger model, such as AstroAI 12v refrigerator – 58quarts (54.88L)

Budget Friendly
BougeRV 12 Volt
BougeRV 12 Volt
  • Capacity - 21.7L
  • Fast Cooling
  • Good Value For Money
Ideal for family camping
AstroAI 12 V Refrigerator
  • Outstanding Capacity - up to 55L (3 different sizes)
  • Fast cooling
  • Ideal for family camping

Final Thoughts

If you are planning to leave food in your car during a camping trip, be mindful of risks involving attracting animals, insects, and potential food spoiling caused by high temperatures.

One of the most effective ways to keep animals distant from your food is ensuring that they are stored in odour-free / airtight containers, such as bear canisters, and keeping them hidden inside your car.

If you are storing food that needs refrigeration, such as meat, fish, and milk, make sure that your supplies are kept cold – never leave them unrefrigerated for more than 2 hours. 

For this kind of food, it might be a good idea to consider a small 12-v camping fridge, such as BougeRV 12V refrigerator. 

How to take eggs camping? (and NOT BREAK or SPOIL them!)

Camping is an exciting way to spend quality time and get acquainted with your family, friends, or workmates. However, one of the aspects that many campers do not adequately consider is the importance of having a healthy diet when you are out in the bushes, especially if you are planning to stay for more than a couple of days and go for long hikes. 

Many hikers focus too much on carbohydrate and sugar intake on their trips but forget to consider their protein needs. According to Mayo Clinic, a healthy diet should include approximately 0.8 grams of protein per kilogram of body weight, and about 10% to 35% of your calorie intake should come from protein. 

how to take eggs camping

Eggs are known for being highly proteic and nutritious and are an essential part of a balanced diet. For example, boiled eggs contain approximately 13 grams of proteins, while fried eggs contain about 14 grams per 100g. They are an excellent option to meet your nutritional needs. However, how to take eggs camping? 

This article will help you understand how to carry eggs and keep them fresh before your next camping trip and how to have a healthy diet. Here are the four most common alternatives campers use:

  • Option #1 – Fill empty water bottles with cracked eggs – Break the egg and put the content in an empty bottle.
  • Option #2 – Freezer food bags or a cooler box – storing eggs at a low temperature keeps them from rotting. Use a reclosable quart freezer bag or a ziploc bag to store eggs in an portable refrigerator or cooler box.
  • Option #3 – Use a compact egg holder  – small plastic holders. 
  • Option #4 – Bring dehydrated eggs – no special storage requirements (apart from keeping away from water/moisture). 

Keep reading below for a detailed explanation of each option, as well as its pros and cons. 

How to pack and carry eggs for camping? Step-by-step and pros and cons of each option

Before jumping into the explanation of each option, it is good to remind you that you can pack and take eggs camping in 4 different states (and each of them comes with some advantages and disadvantages – see table below):

 
Egg StateAdvantagesDisadvantages
Whole Egg (raw)
  • Freshness
  • Extended life
  • Risks of cracking or breaking
  • Limited options to carry
Cracked Egg
  • Lightweight 
  • Less spacious
  • Fit easily in containers, bags, and bottles
  • Risk of spilling
  • Spoil faster
Dehydrated / Powdered Egg
  • Durable
  • Lightweight
  • Easy to carry
  • Loss of freshness / flavor
  • Easily affected by water/moisture
Hard-Boiled Egg
  • Ready to eat
  • Do not break
  • Fast spoiling (max. 2 hours)
  • Re-heating  can be challenging, (bring a camp stove)

Option 1 - Using empty water bottles

Recommended for: Whole Eggs, Cracked Eggs, Powdered Eggs (if sealed) and Hard-boiled eggs. 

You have three alternatives if you consider using empty water bottles. You can carry the eggs whole, cracked, and hard-boiled (powdered eggs only if it completely sealed). 

We recommend you to take pre-cracked eggs because it is the easiest way to carry and save some space. Overall, the process is pretty simple:

  • Crack the eggs and pour the content inside a recycled bottle, then tightly seal the bottle’s lid to avoid any leaks 
  • Store in cooler or cold water and do not let it be exposed to hot areas. 
Pros
  • Single bottle can carry multiple eggs
  • Lightweight and easy
  • Cheap
Cons
  • Risks of spill
  • Need of keeping eggs cool
  • Eggs can spoil

Editor’s note: Pick a bottle with a wide bottleneck to avoid breaking them while putting and removing from the bottle. 

Option 2 - Using Freezer food bags or a cooler box

Recommended for: Whole Eggs (raw), Cracked Eggs and Hard-boiled eggs. 

If you are bringing cooler boxes or using freezer food bags, you just need to: 

  • Place the eggs in a cardboard holder, bottle, or bag.
  • Ensure your cooler has a low temperature. If not, add ice cubes (worth checking Icybreeze V2 pro – dual-use: cooler and tent air conditioner)
  • Put the eggs at the top of the cooler to avoid breaking (or with protection against impact)
Pros
  • Eggs can stay fresh longer
  • Can take many eggs
  • Cooler box provides plenty of space
Cons
  • Cooler box is not ideal for hikers
  • More camping load

Option 3 - Using an egg holder

Recommended for: Whole Eggs (raw) only. 

You can simply take your eggs for your next trip with plastic holders. There are plenty of options in the market (check different sizes and shapes on amazon), and make sure to choose one that is sturdy and will absorb impact. 

Pros
  • Protection against impact
  • Different sizes and shapes (fits hikers and family camping)
  • Very cheap and sturdy
Cons
  • Only carry whole eggs (raw)
  • Eggs can break and spill

Option 4 - Bringing Powdered / Dehydrated Eggs

Recommended for: Hiking and backpacking trips

Powdered eggs are 100% dehydrated but still, keep the nutritional benefits of this food. You can buy them in the supermarket, such as Judee/s dried eggs, or make it at home (cheaper solution – check this guide

The benefits of dried eggs are many and include a high concentration of nutrients, longer life (if kept dry, it can last for months), less storage space, and bacteria growth inhibition (because of the lack of water), making this option ideal for backpackers and hikers.

On the other hand, some people complain about the loss of freshness and taste, as loss of certain cooking properties, such as aerating and foaming power.

Pros
  • Long life span
  • Lightweight 
  • Easy to carry
  • Inhibits bacteria growth
Cons
  • Pre-made products are expensive
  • Takes time to prepare (if DIY)
  • Loss of taste
Judee’s Dried Egg
  • No additives and a low calorie protein powder.
  • Gluten-free facility and shipped in a standup, resealable pouch to ensure freshness
  • Ingredients: 100% Dried Egg White Powder

Important tips to take eggs camping

We have prepared some special tips to help you pack, take and cook eggs on your next trip, such as:

  1. Always carry and store eggs at temperatures below 40°F to keep them fresh – If you are using an ice box, add ice cubes to it to keep the temperature low and prolong the life and freshness of your eggs.
  2. Make sure that the eggs that you are buying are clean and uncracked. Otherwise, you are risking getting Salmonella. Salmonella is a bacteria that can be present on an eggshell and can cause intestinal infection and diarrhea. 
  3. Make sure your egg supplier always keeps them refrigerated.
  4. If you are using dried eggs, always make sure to tightly seal the package after using it – its long life span can be gone if the product is in touch with water. 
  5. Consider bringing a portable wood stove for tents or a propane stove to cook or boil the egg and prepare delicious meals.

How do you know if an egg is rotten while camping?

If you are in doubt about whether your egg is rotten or not, do the following:

  1. Snif the egg: This is the most obvious way of checking if an egg is rotten. A foul smell is a clear indicator not to eat the egg.
  2. Check the discolouration: Check for any discolouration on a cracked egg. A fresh egg should either be orange or yellow. 
  3. Do a Float test: Do a float test with water in a bowl at room temperature. If the egg sinks, then it is okay. But if it floats, then it is not good for consumption.

How long do cracked eggs last, and how do you keep them fresh while camping?

At room temperature, pre-cracked eggs can last two days. But it is important to keep eggs in an airtight bottle or Ziploc. Also, it is necessary to keep the eggs away from direct sunlight.

Carry eggs at temperatures lower than 40°F. Coolers and freezer backs are two refrigeration alternatives to consider. If you do not have a cooler box, use ice cubes instead.

What are the other refrigeration alternatives to store eggs while camping?

Use a container filled with cold water or rice to store eggs to maintain their freshness. 

You can also consider a 12-v camping fridge, such as the Bodega 12v refrigerator

Final Thoughts

Having warm and delicious scrambled eggs in the morning while camping is great way to start your day. Nonetheless, understand how to safely pack and ggs for camping to enjoy this experience.

Remember that incorrect packing techniques can lead to food poisoning while camping. Fortunately, you can efficiently carry eggs whole, cracked, powdered, or boiled for camping after reading this article.

Use the above information to prepare and pack eggs for camping and enjoy every breakfast moment.

All You Need to know about UV Protection for Tents!

When you’re out camping, one of the last things you want to worry about is whether your tent will hold up against the elements. UV rays can cause severe damage to your tent and 2 weeks of direct UV exposure might decrease tear strength in 50%, according to Nikiwax.

Therefore, it’s essential to learn how to protect your gear! But what does UV protection for tents mean? UV protection for tents is essentially any coating or material that helps block out harmful UV rays. It can be done via sprays, fabrics, and even special coatings that are sprayed onto the tent’s exterior. 

Let’s go through a detailed review of tent UV protection in this article. 

uv protection for tents

Why is UV protection necessary for your tent?

UV rays are known to cause fading and deterioration in various materials – including your tent’s fabric. This damage might become irreparable over time, and your tent will eventually become unusable.

In addition, UV rays can also cause health problems, such as skin cancer, premature aging, and even damage to your eyers. 

Fortunately, there are a few different ways to protect tent from the sun. One of the easiest ways is to simply buy a tent with built-in UV protection or you can use UV-protective sprays or coatings that you can apply to your existing tent. 

How to DIY Tent UV Protection?

First of all, if you are about to buy a tent, you should check whether your tent already comes with some sort of SPF (sun protection factor) and UV coating applied to it. Overall, we recommend tents with at least a 30 SPF (ideally above SPF+50).

If you have had your gear in a while or are not sure whether it has any protective coating, you can easily protect any tent from dangerous UV radiation by following these three easy steps:

Step 1 - Set up the tent

First and foremost, pick a spot for the tent. Make sure to choose a shaded area, clear of any rocks or sticks. Then, lay down a ground tarp to help keep your tent’s bottom clean and dry. Also, don’t forget to stake it down, so it doesn’t blow away in the wind.

Step 2 - Rinsing with water

Rinsing the tent with cold water before applying the UV protection spray is a great idea. It will eliminate all the dust and dirt from your tent’s fabric and will make the protective coating more efficient. 

Step 3 - Applying the UV protection spray and let it dry

Now, pour a UV coating, such as Starbrite spray (more options are detailed below), into a clean spray bottle and spray the solution evenly over all exposed areas of your tent and let it dry completely for at least 30 minutes.

Wait until it dries, and that is it – you can enjoy your summer camping trip easily. 

Best Options for UV Protector Tent Sprays

We have made a list of some of our favorite UV Protection sprays for tents. Check them out and find the most suitable one for your camping tent.

STAR BRITE UV Spray
Best Overall
STAR BRITE UV Spray
9.3
  • Compatible tent fabric

Nylon, Polyester, Canvas

  • Available in Sizes

22 Oz, 64 Oz, 128 Oz

Nikwax Tent & Gear Solarwash
Biodegradable
Nikwax Tent & Gear Solarwash
9.2
  • Compatible tent fabric:

Nylon, Polyester, Canvas

  • Available in sizes:

17 Oz, 34 Oz

Scotchgard Sun and Water Shield
Budget Friendly
Scotchgard Sun and Water Shield
9.2

Budget-Friendly 

  • Compatible tent fabric

Nylon, polyester, Canvas

  • Available in sizes

10.5 Oz, 21 Oz, 42 Oz

How often do you need to use UV Tent Sprays?

The frequency of use will depend on the severity of the sun’s rays and how long you plan on using the tent. 

Overall, If you’re camping in an area with intense sunlight for consecutive days, you may need to reapply the spray every week. 

However, if you’re only going to be using your tent for short periods and have low sunlight exposure, you may only need to apply the spray once before storing it away.

How to know whether my tent already has UV protection?

Most tent manufacturers will indicate if a particular model has UV protection on the label. However, it’s always best to check with the manufacturer for double safety. 

What are UV Protected Tents?

UV-protected tents are tents that have been treated with a UV-protective spray or solution. They help reflect the sun’s rays, making it less likely for your tent to suffer from UV damage.

Overall, beach tents already come with some level of protection, but you will need to re-apply a protective coating every now and then. 

What are the best tent fabrics for UV protection?

Synthetic fabrics, such as nylon and polyester, have better protection against UV rays and last longer than canvas tents (even though these are thicker and more robust).

However, regardless of the fabric that you choose or have (read our detailed article about tent fabrics), you will need to maintain and re-spray to make them last longer constantly. 

Benefits of using a UV Protected tent

There are a lot of benefits of switching to a UV-protected tent instead of a traditional camping tent. Here are its top 3 benefits:

1. It helps to keep the tent cool

UV Protected tents can help to keep you cooler in the summer months, as they reflect  the sun’s rays, keeping it cooler. However, summer camping can be challenging even with UV protected tents, therefore it might be worth considering a camping air conditioner

2. It extends the life of your tent

They can help extend the life of your tent by protecting it from harmful UV rays and minimizing the damages to your gear. 

3. It is an intelligent purchase

UV protected tents that can help you save money in the long run, as they will last longer than tents that are not protected from UV damage (but ensure to re-apply the protective coating).

UV Protected Tents: Our Top Recommendations

Here are our top 4 recommendations for UV Protected tents available in the market:

1. OutdoorMaster Pop Up Beach Tent - Best for Beach Camping

If you’re looking for a UV protected tent that is easy to set up and take down, the OutdoorMaster Pop Up Beach Tent is a great option. This tent offers 50+ UV sun protection and is made with water-resistant and breathable polyester fabric.

 Additionally, the tent comes with its carrying case, making it easy to transport. This tent has a versatile design with large mesh windows for ventilation and a built-in zippered door for secured privacy. 

The lightweight structure weighs just 8.15 pounds and is ideal for camps and beach use.

Pros
  • Lightweight
  • Easy to use and set up
  • Strong build quality
Cons
  • Some Issues around durability
OutdoorMaster Pop Up Beach Tent

Best for beach camping

  • Material: Polyester, Glassfiber
  • Weight: 8.15 pounds
  • Product dimensions: 53 x 95 x 51 inches

2. Abco Tech Pop-up Camping Tent - Best for 2 people

An ideal choice for 1-2 people, the Abco Tech Pop-up Camping tent is a compact and secured option. The pop-up design becomes ready to use in a blink of an eye. 

This camping tent comes with UV 50+ protection. It is waterproof and has mesh windows and flaps for air circulation and privacy. 

It is made from nylon to ensure added durability. The tent weighs only 3.7 pounds and is perfect for campers and hikers.

Pros
  • Easy to set up
  • Easy to carry & move around
  • Lightweight
Cons
  • Not ideal for extreme weather conditions
  • Fabric issues
Abco Tech Pop-up Tent

Best for 2 people

  • Material: Nylon
  • Weight: 3.7 pounds
  • Product dimensions: ‎27 x 27 x 2 inches

3. Core 9-Person Instant Cabin - Best for a family camping group

Camping is all about big groups and families. So, here comes the next option, which is the Core 9-Person Instant cabin

It has a zipper closure and an instant 60-second setup. Upto 9 people can easily fit in this instant cabin without any discomfort. 

The coolest feature of this UV protected tent is that it has a room divider, wall storage pockets, and an electrical cord. What else can anyone ask for in a camping tent, right?

You can easily air condition these types of tents by learning through our article- How to air condition a tent?

Pros
  • Very spacious
  • Highly durable
  • Waterproof
  • Durable and reliable
Cons
  • None identified
Core 9 Person Instant Cabin Tent

Best for a family camping group

  • Material: Polyester
  • Weight: 27.62 pounds
  • Product dimensions: 48 x 11.5 x 11.5 inches


4. Naturehike Cloud-Up 3-Person Lightweight Backpacking Tent - Best for backpacking and hikers

The most suitable backpacking tent for hikers is the Naturehike Cloud-up 3 person lightweight backpacking tent. It offers the most spacious and comfortable accommodation for hikers, making their trip more enjoyable.

The tent is made up of reliable and strong YKK zippers, and mesh pockets with full coverage to enhance the overall experience.

Furthermore, it includes a 20D tent polyester rainfly which makes it extremely waterproof even in extreme weather conditions.  

You can learn how to make your tent waterproof in our article- Are tents waterproof? (And how to waterproof them!)

Pros
  • Lightweight
  • Freestanding
  • Super breathable
Cons
  • Not ideal for large groups
  • Not enough ventilation
Naturehike Cloud-Up Tent

Best for backpacking & hikers

  • Material: Nylon, Aluminum
  • Weight: 2.69 pounds
  • Product dimensions: 17.13 x 6.69 x 6.69 inches

Conclusion

When camping, it’s essential to take steps to protect yourself from the sun’s harmful UV rays. One way to do this is by using a UV-protected tent. These tents are treated with a UV-protective spray or solution, which helps to reflect the sun’s rays. 

Our top choice for a UV-protected tent is the OutdoorMaster Pop Up Beach Tent. It is a perfect overall choice due to its robust build and high SPF protection. 

The Core 9-Person Instant cabin and Pop-up camping tent are other great options for large groups and couples respectively.

Furthermore, always be sure to choose a tent specifically designed for UV protection and follow the instructions on the label carefully. This will help to ensure that your tent stays in excellent condition for years to come.